Settings Guide
Configure every aspect of your booking system
Settings Overview
The Settings panel in WP Booking System Pro is organized into six tabs, each controlling a different area of your booking system. Navigate to WP Booking System → Settings in your WordPress admin to access them. This guide walks through every option so you can fine-tune the system for your specific business.
Tab 1: General Settings
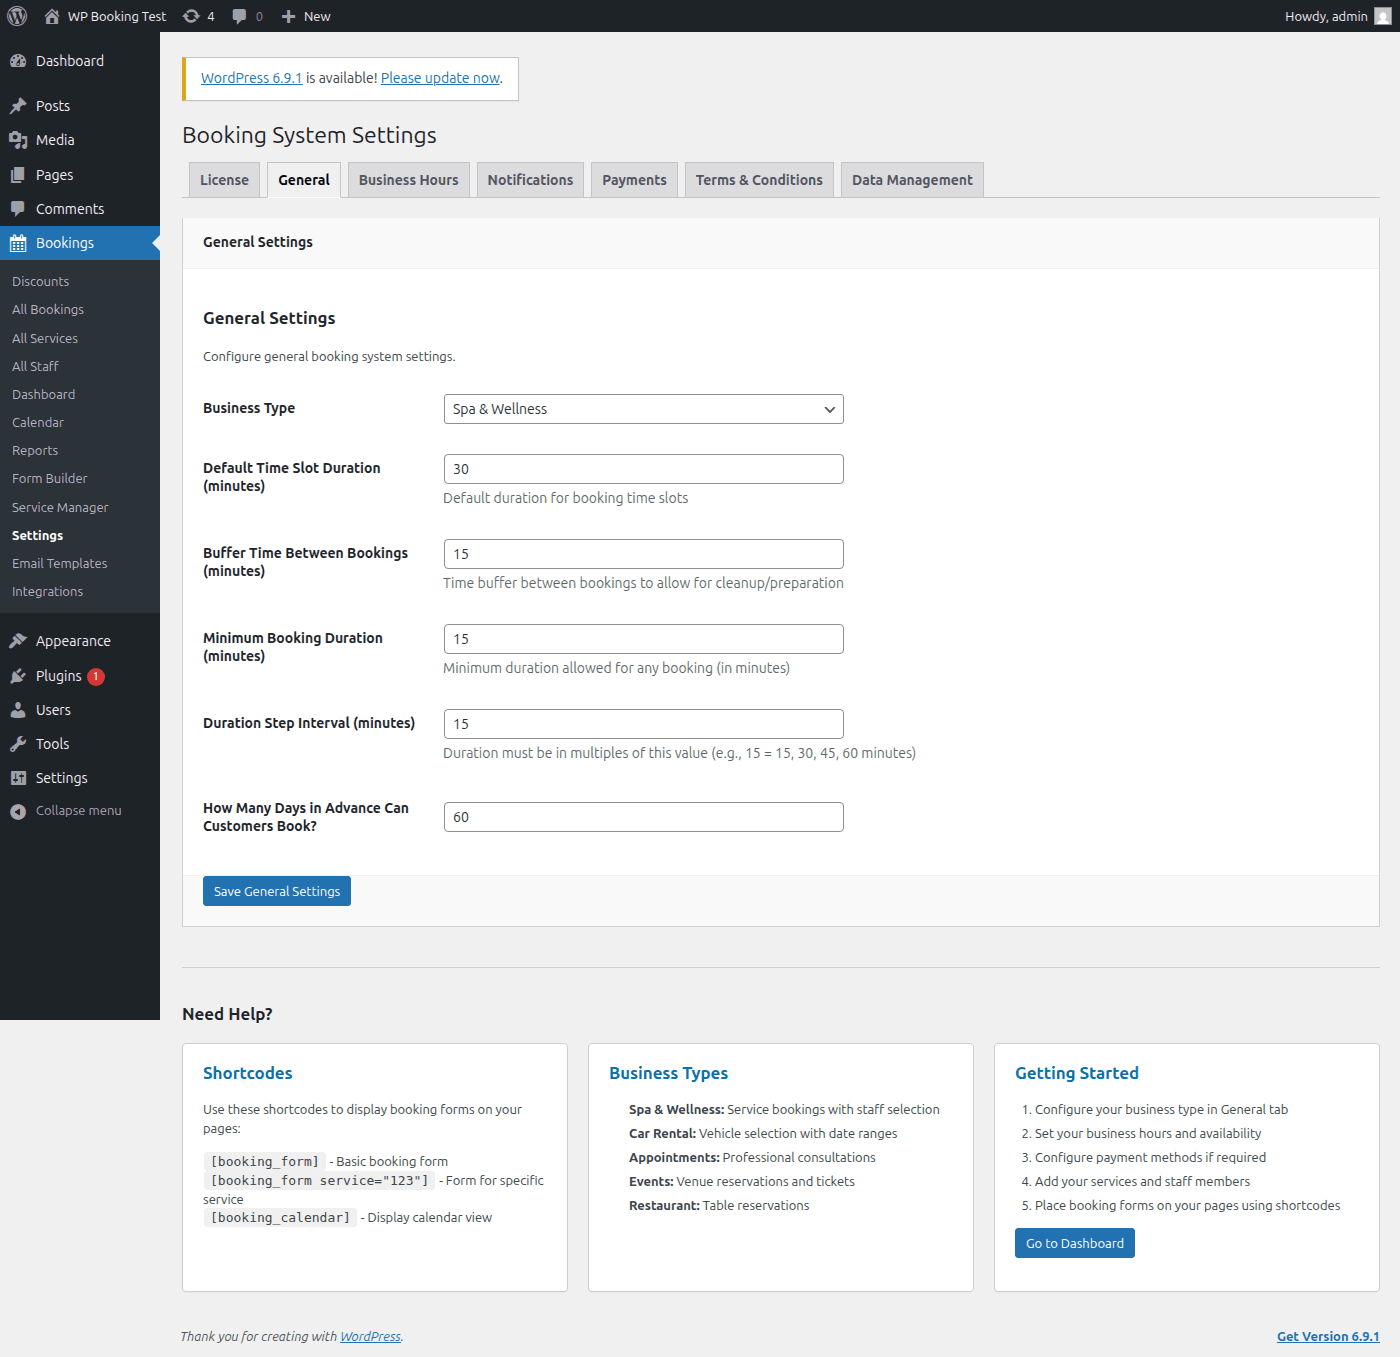
The General tab contains the foundational settings that shape how your booking system behaves. These values are applied globally and determine defaults for every service and staff member unless overridden at the individual level.
Business Type
Selecting the correct business type tailors the booking form labels, default durations, and calendar layout to match your industry. This is the first setting you should configure after installation.
| Value | Best For | Behaviour |
|---|---|---|
general | Catch-all default | Standard date/time picker with no industry-specific wording. Suitable for any business that does not fit the categories below. |
spa | Spas, salons, wellness | Labels change to “Treatment” and “Therapist.” Duration defaults to 60 min. Multi-service add-ons enabled. |
car_rental | Vehicle hire, equipment rental | Enables date-range picker (pick-up / drop-off). Duration is measured in days rather than minutes. |
appointments | Clinics, consultants, tutors | Single time-slot selection with optional staff preference. Calendar shows free/busy indicators. |
events | Workshops, classes, tours | Capacity-based slots instead of one-to-one. Attendee count field is displayed automatically. |
restaurant | Restaurants, cafes, dining | Adds party-size selector and table preference. Duration defaults to 90 min dining window. |
Recommended: Choose the type that most closely matches your business even if it is not an exact fit. You can always override individual labels in the form builder later.
Time & Duration Settings
Default Time Slot Duration (minutes)
Controls the length of each bookable slot shown on the calendar. For example, setting this to 30 generates slots at 9:00, 9:30, 10:00, and so on. Individual services can override this value.
60 | Recommended: 30 for salons/clinics, 60 for consultations, 15 for quick servicesBuffer Time Between Bookings (minutes)
Adds an automatic gap after every booking. This gives staff time to prepare for the next customer, clean a room, or travel between locations. The buffer period is not bookable by customers.
15 | Recommended: 10 – 15 min for most businesses, 30 for cleaning-heavy servicesMinimum Booking Duration (minutes)
The shortest booking a customer is allowed to make. This prevents impractical micro-bookings. If a customer selects a duration shorter than this value, the form will display a validation error.
15 | Recommended: Match this to your shortest service durationDuration Step Interval (minutes)
When customers can choose their own duration (e.g., meeting rooms), the step interval determines the increments available. A step of 15 means the customer can pick 15, 30, 45, 60, 75 minutes, and so on.
15 | Recommended: 15 or 30 for clean scheduling incrementsAdvance Booking Days
How many days into the future the calendar allows customers to book. Dates beyond this window appear greyed out. Setting a lower number keeps your schedule manageable; a higher number helps customers who plan ahead.
30 | Recommended: 30 for service businesses, 60 – 90 for events and venuesNeed Help?
If you are unsure which values to start with, here are some quick links:
- Shortcodes Guide — learn how to embed booking forms on your pages
- Getting Started — a 10-minute walkthrough to create your first booking
- The business type table above explains how each type changes the booking form
Tab 2: Business Hours
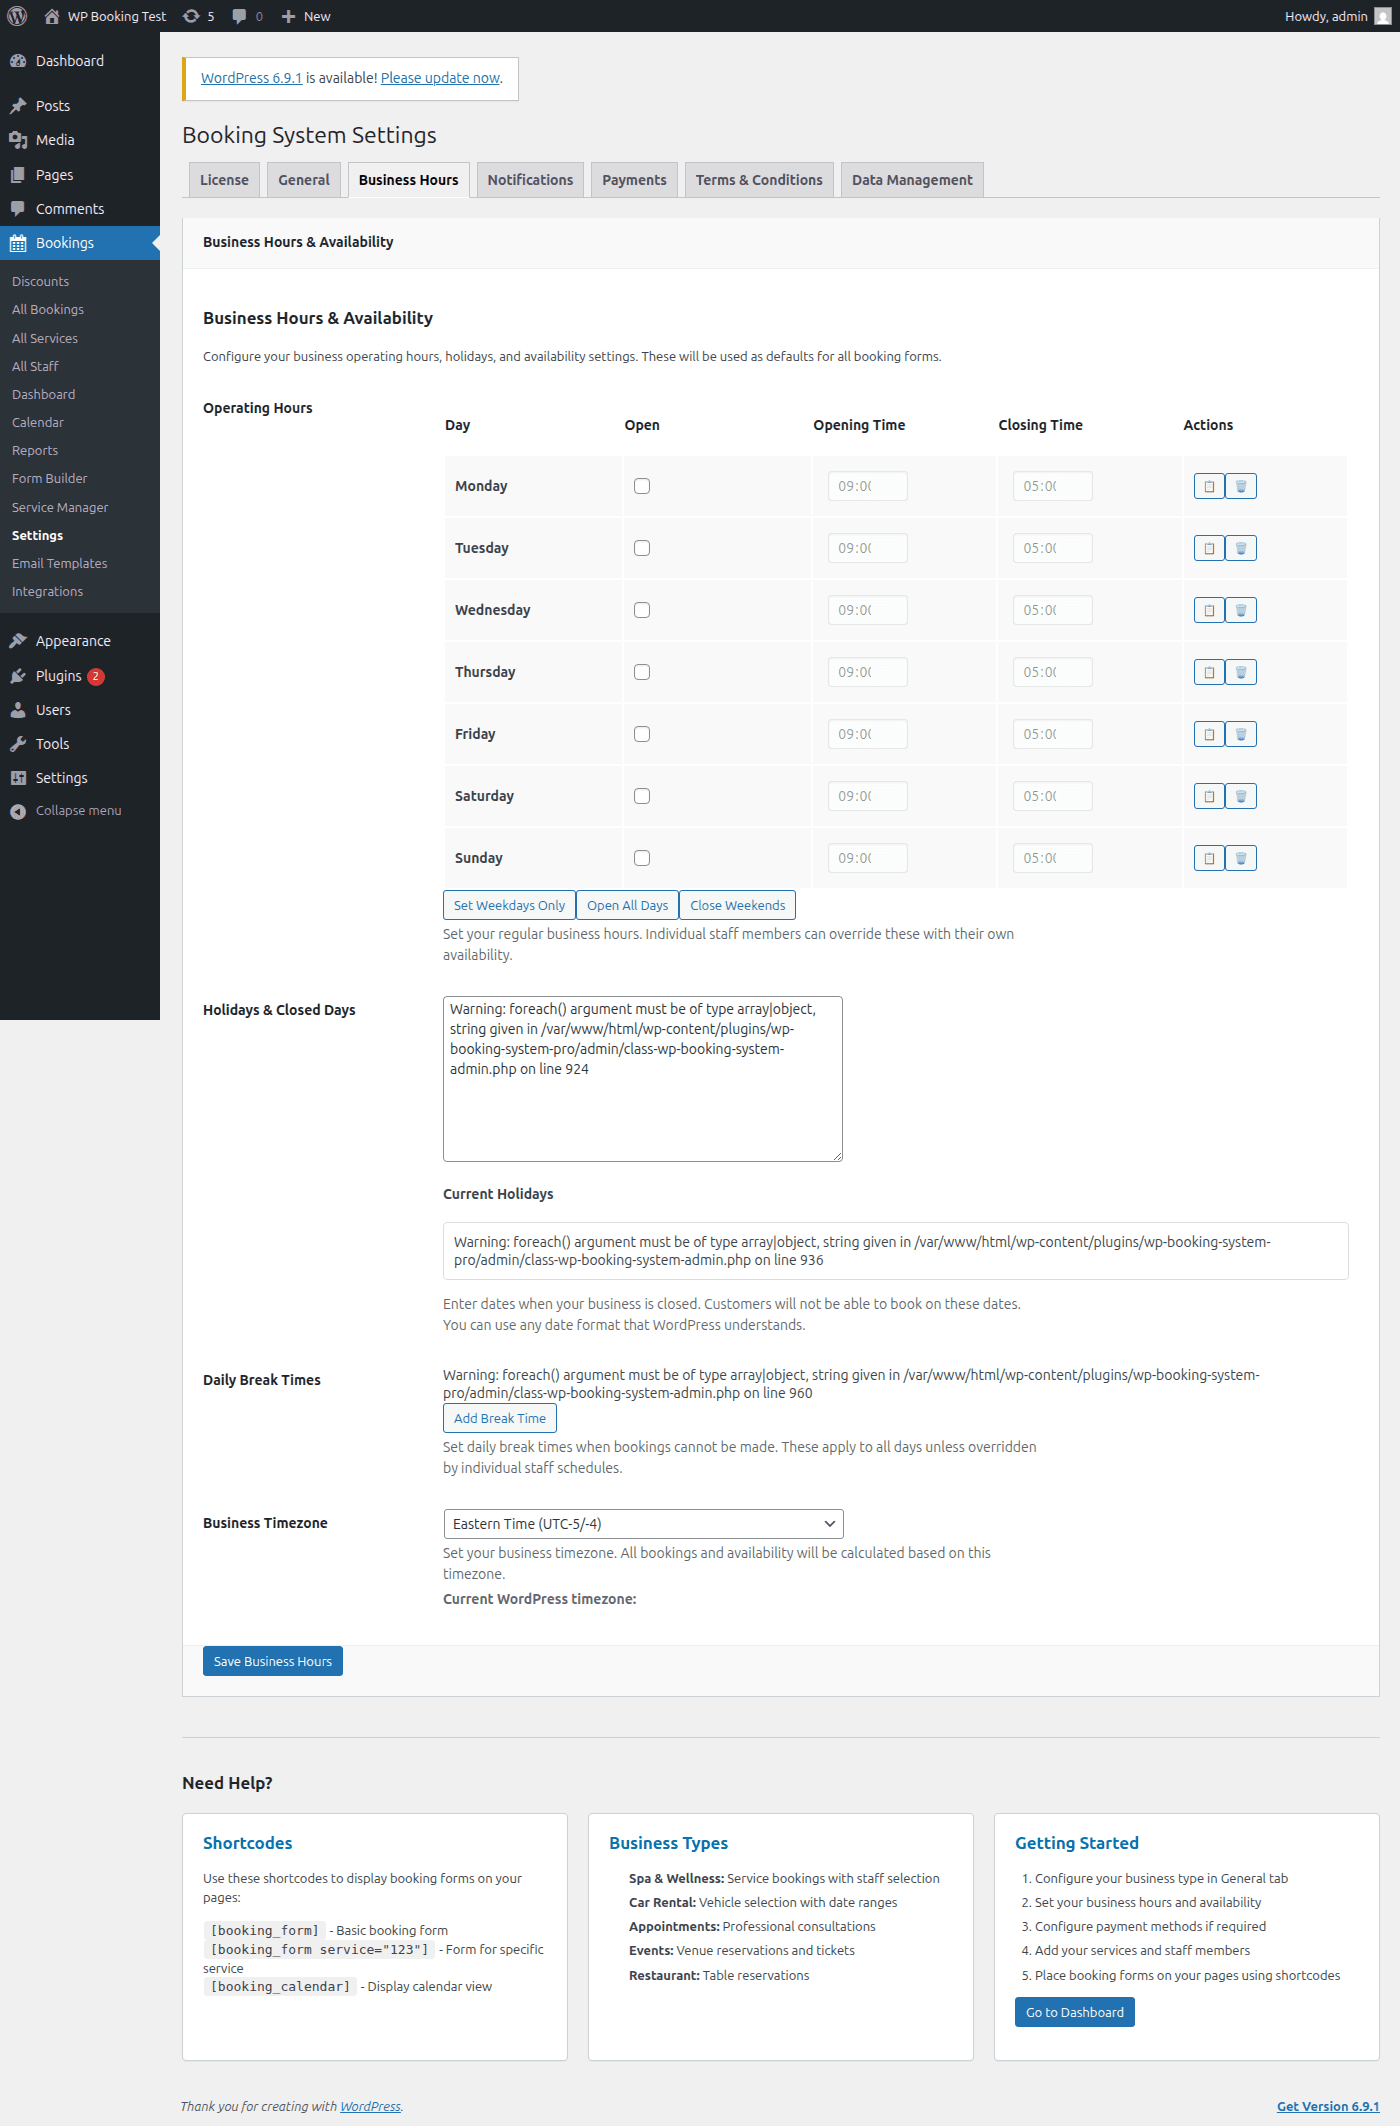
Business Hours define when your organization is open and available for bookings. These hours apply globally as the default; individual staff members can override them with their own availability if needed.
Per-Day Configuration
Each day of the week (Monday through Sunday) has three controls:
Flip the toggle to open or close bookings for that day. Disabled days appear greyed out on the customer calendar and no time slots are generated.
The earliest bookable slot for the day. Uses 24-hour format (e.g., 09:00).
The latest time a booking can end. If closing time is 17:00 and your slot duration is 60 minutes, the last bookable slot starts at 16:00.
Default: Monday – Friday enabled, 09:00 – 17:00. Saturday and Sunday disabled.
Holiday Dates
Use the date picker to add specific dates when your business is closed (national holidays, annual shutdowns, special closures). Holidays override the regular schedule — even if a day is normally enabled, adding it as a holiday blocks all bookings for that date.
- Click the Add Holiday button
- Select the date from the calendar picker
- Optionally enter a label (e.g., “Christmas Day”)
- Click Save
Warning: Adding a holiday does not automatically cancel existing bookings on that date. If you need to close a day that already has bookings, reschedule or cancel them manually first.
Break Times
Breaks carve out non-bookable windows within the working day. You can add multiple breaks — for example, a lunch break and a short afternoon pause. Each break requires a name, start time, and end time.
Example Configuration
| Name | Start | End |
|---|---|---|
| Lunch Break | 12:00 | 13:00 |
| Afternoon Pause | 15:30 | 15:45 |
Break times are removed from the available time slots automatically. Customers will not see these periods when choosing a booking time.
Business Timezone
Select the timezone your business operates in. All time slots, business hours, and booking confirmations use this timezone. The default is pulled from your WordPress general settings (Settings → General → Timezone).
Tip: If your customers are in a different timezone than your business, the booking form will display times in your business timezone. Confirmation emails include the timezone label so there is no ambiguity.
Tab 3: Notifications
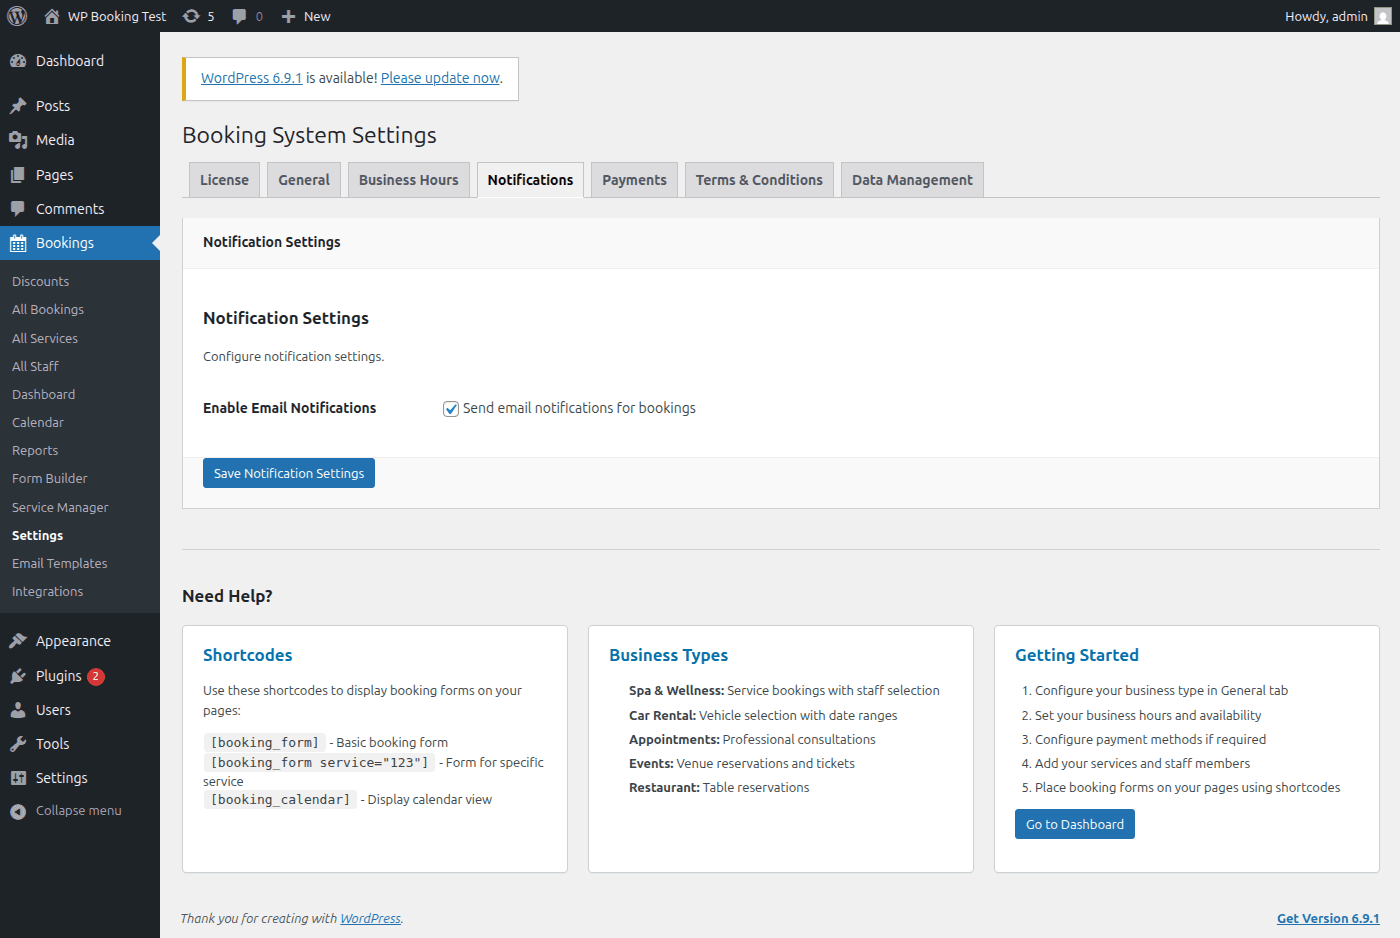
The Notifications tab gives you a master switch over all email communications sent by WP Booking System Pro. When enabled, the system dispatches emails for new bookings, confirmations, cancellations, reminders, and status changes.
Enable / Disable Email Notifications
This is a global on/off switch. When turned off, no booking-related emails are sent to customers or staff — including confirmation emails and reminders. This can be useful during initial setup or testing when you do not want customers receiving messages.
When Enabled
- • New booking confirmation to customer
- • New booking alert to admin/staff
- • Cancellation notices
- • Rescheduling notifications
- • Appointment reminders
- • Payment receipts
When Disabled
- • No emails sent for any event
- • Bookings still function normally
- • Admin dashboard still shows all data
- • Useful for staging / testing
Recommended: Keep this enabled for production sites. Customers expect a confirmation email after making a booking. Turn it off only while you are setting up or migrating data.
Tab 4: Payments
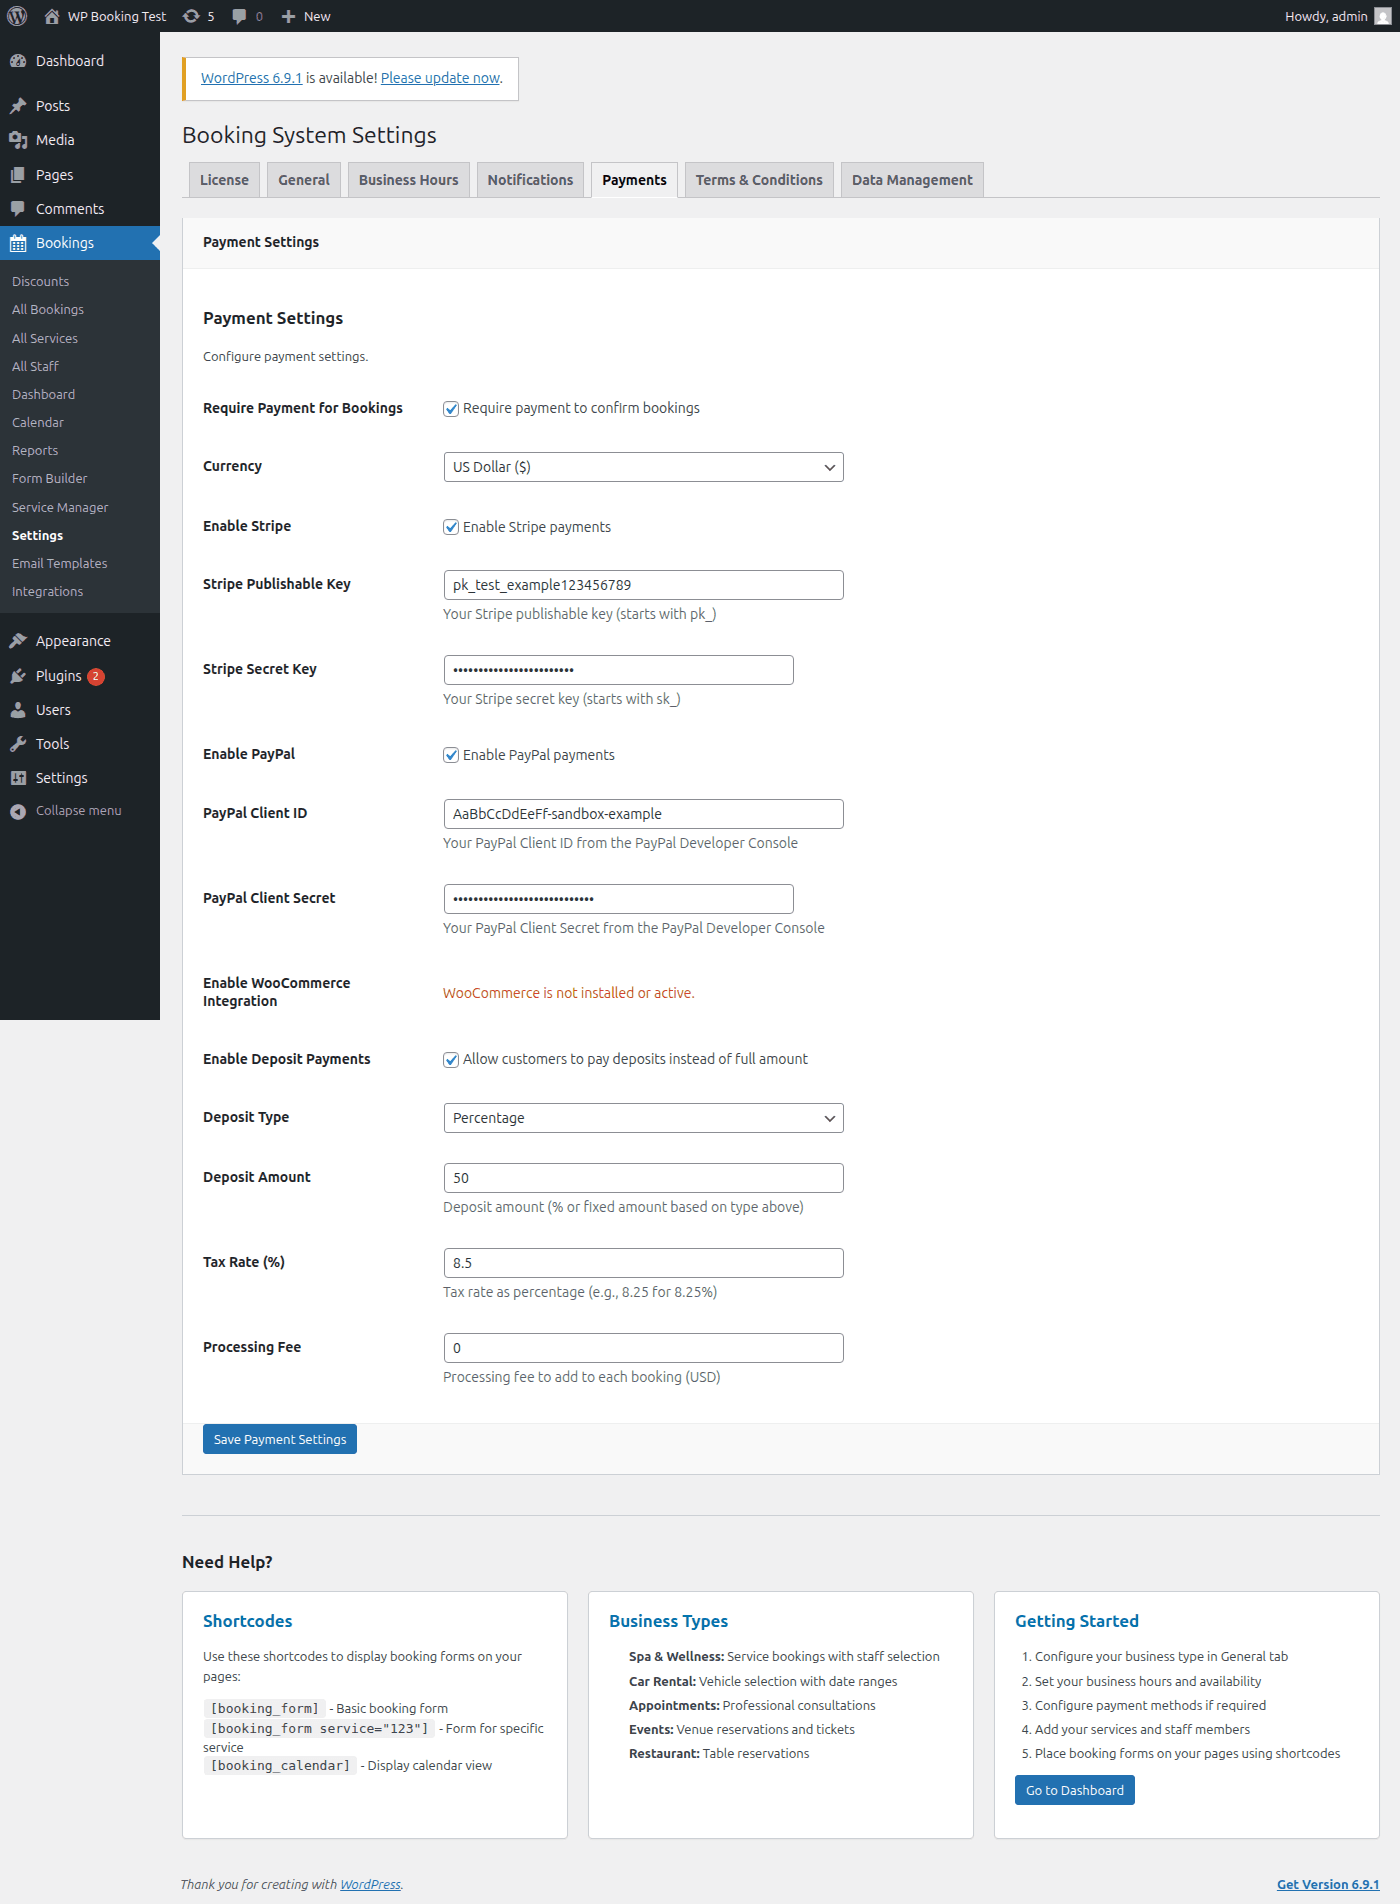
The Payments tab is the most detailed settings section. It controls whether payments are collected, which gateways are active, deposit rules, taxes, and processing fees. If you offer free bookings only, you can leave this entire tab at its defaults.
Require Payment for Bookings
When checked, every booking must include a successful payment before it is confirmed. Unpaid bookings remain in “Pending Payment” status. When unchecked, bookings are confirmed immediately without payment.
Currency
Select the currency used across pricing, invoices, and receipts. All amounts are displayed and charged in this currency.
USDEURGBPCADAUDJPYDefault: USD. Ensure your payment gateway account supports the currency you select here.
Stripe
Stripe is the recommended payment gateway for most businesses. It supports credit cards, Apple Pay, and Google Pay out of the box.
pk_. Safe to use in client-side code.sk_. Never expose publicly.whsec_. Required for Stripe to notify your site of payment events (successful charges, refunds, disputes). Create a webhook endpoint in your Stripe dashboard pointing to https://yoursite.com/wp-json/wp-booking/v1/stripe-webhook.Important: Use test-mode keys (starting with pk_test_ and sk_test_) while setting up. Switch to live keys only when you are ready to accept real payments.
PayPal
PayPal is a widely trusted gateway, especially for international customers. Configure the following fields to enable it:
WooCommerce Integration
Toggle this on to route booking payments through WooCommerce checkout. This is ideal if you already run a WooCommerce store and want to use your existing payment gateways, coupons, and tax rules for bookings.
Tip: WooCommerce must be installed and active before this toggle appears. If you do not see it, install WooCommerce first.
Deposit Payments
Deposits let you collect a partial payment upfront and the remainder later. This reduces no-shows while lowering the financial barrier for customers.
percentage (e.g., 25% of total) or fixed (e.g., $20 flat fee)25 for 25% or 20 for $20)Tax Rate (%)
A flat tax percentage applied to every booking total. Set to 0 if your services are tax-exempt or if you handle tax through WooCommerce.
Processing Fee
A fixed fee added to every booking to cover payment gateway charges or administrative costs. Displayed as a line item on the booking summary.
Bank Transfer Details
A free-text field where you can enter your bank account information for manual / offline payments. When a customer chooses bank transfer, this text is displayed on the confirmation screen and included in the confirmation email.
Bank: First National Bank
Account Name: Acme Bookings LLC
Account Number: 1234567890
Routing Number: 021000021
Reference: Your booking ID
Tab 5: Terms & Conditions
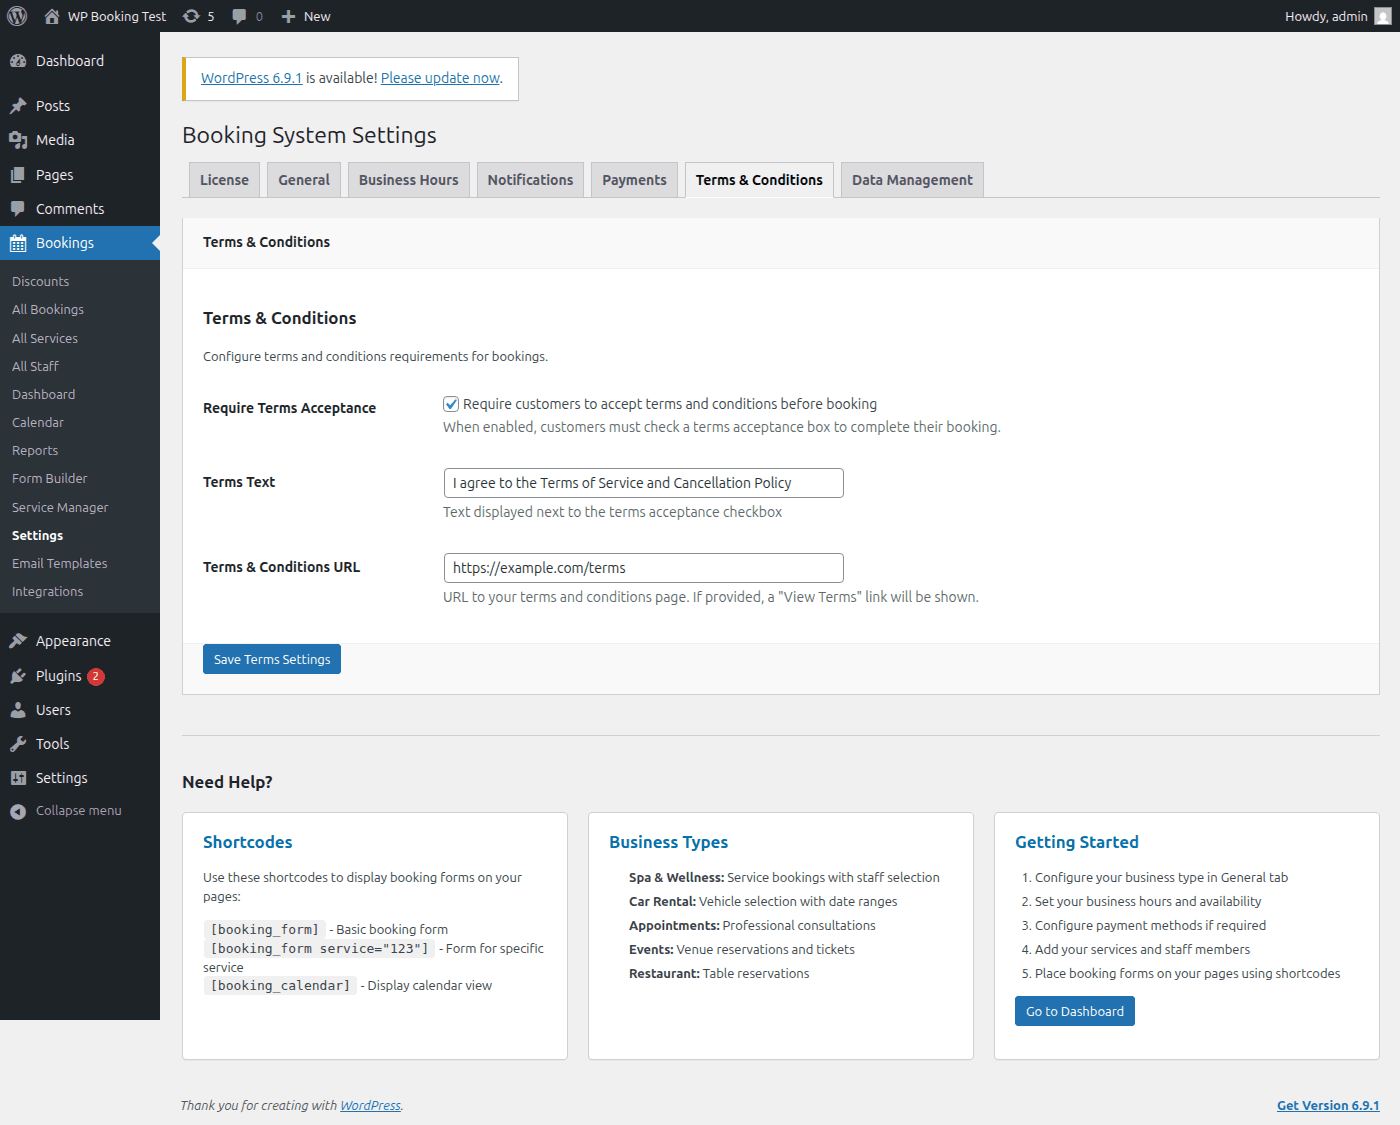
Requiring customers to accept your terms before completing a booking protects your business legally and sets clear expectations around cancellation policies, refunds, and responsibilities.
Settings
Require Terms Acceptance
When checked, a mandatory checkbox appears at the bottom of the booking form. Customers cannot submit the form without ticking it. This ensures explicit consent is recorded with every booking.
Terms Text
The label displayed next to the checkbox. Keep it short and clear.
Terms URL
A link to your full terms page. If provided, the terms text becomes a clickable link that opens in a new tab. This should point to a dedicated WordPress page containing your complete terms and conditions.
Tip: Even if you do not require terms acceptance, it is good practice to link to your policies in the booking confirmation email. This provides transparency and builds trust.
Tab 6: Data Management

Data Management controls what happens to your booking data if the plugin is ever deactivated and deleted from WordPress. This is a critical safety setting.
Keep Data on Uninstall
When this option is enabled, all plugin data is preserved in your database even if the plugin is deleted. This means you can reinstall the plugin later and all your bookings, services, staff, and settings will still be there.
Deleted When Disabled
- • All booking records
- • Services and categories
- • Staff profiles and availability
- • Custom database tables
- • Plugin settings and options
- • Email templates
- • Payment transaction logs
Always Kept (Unaffected)
- • WordPress users and roles
- • Pages and posts (including booking pages)
- • Media uploads
- • Other plugin data
- • Theme settings
- • Stripe/PayPal account data (stored externally)
Strong Recommendation
Always keep this option enabled. Data loss from an accidental uninstall is irreversible. If you are troubleshooting an issue and need to reinstall the plugin, having this enabled ensures no data is lost.
The only reason to disable this is if you are permanently removing the plugin and want a clean uninstall that leaves no traces in your database. Even then, take a full database backup first.
Quick Reference: Recommended Defaults
| Setting | Default | Recommendation |
|---|---|---|
| Business Type | general | Match to your industry |
| Time Slot Duration | 60 min | 30 for salons, 60 for consulting |
| Buffer Time | 15 min | 10 – 15 min |
| Advance Booking | 30 days | 30 – 90 days |
| Email Notifications | Enabled | Keep enabled for production |
| Currency | USD | Match your locale |
| Keep Data on Uninstall | Disabled | Always enable |
Settings Configured!
Your booking system is now fully configured. Review each tab once more to confirm everything matches your business requirements, then move on to the next guide.
Next: Customer Dashboard